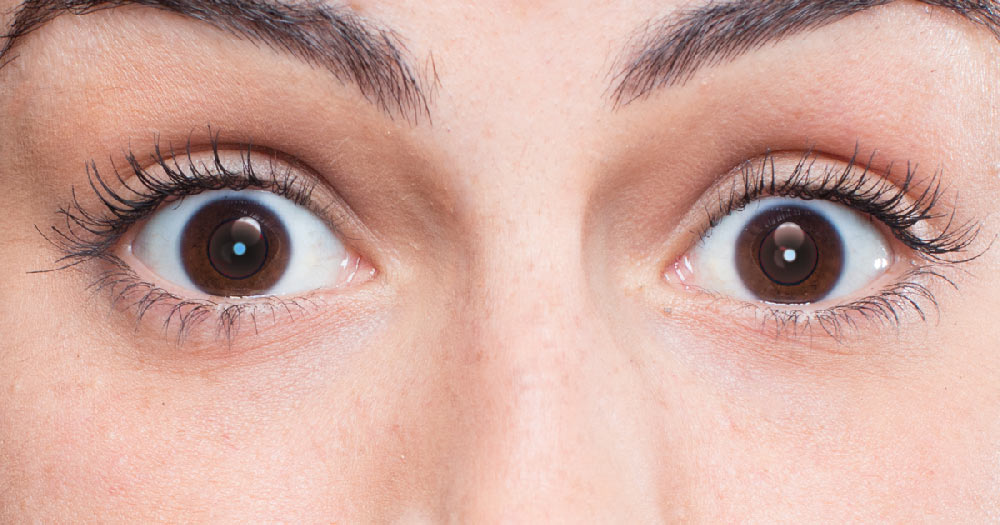
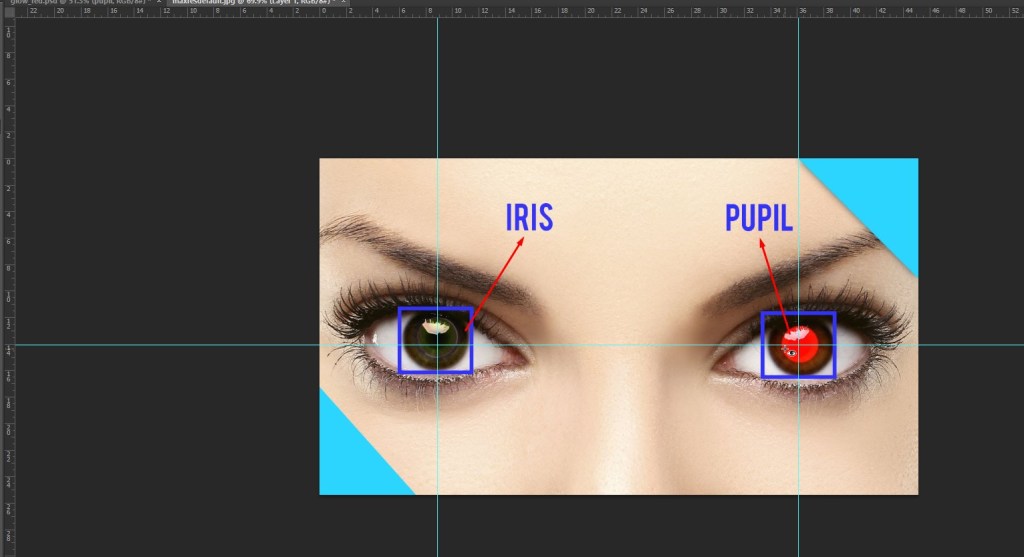
You’ve probably seen the redeye effect if you’ve ever used your camera’s flash to snap a photo of someone in a dark room. It occurs when a person’s pupils turn bright red instead of their normal black. Even when photographing someone in a well-lit environment, the flashlight can occasionally travel through the subject’s pupil and be mirrored by the blood vessels at the back of the retina.
Their eyes appear to glow crimson as a result. In Photoshop, there are a few options for removing red eyes. Let’s have a look at the entire approach on how to remove redeye in photoshop.
Quick Guide of How to remove redeye in photoshop?
To rapidly remove red eyes in pictures, use the Red Eye Tool in Photoshop
- Zoom in on the red eyes in the photo.
- Select Red Eye Tool at the bottom of the list while holding down the Healing Brush tool.

- Click on the red eyes to make them normal again.
How to Remove RedEye in Photoshop Manually?
You may also manually remove red eyes if you want greater control over the quality direct consequence
- Zoom in on the red eyes in the photo.
- Select Color Sampler Tool by clicking and holding the Eyedropper tool.
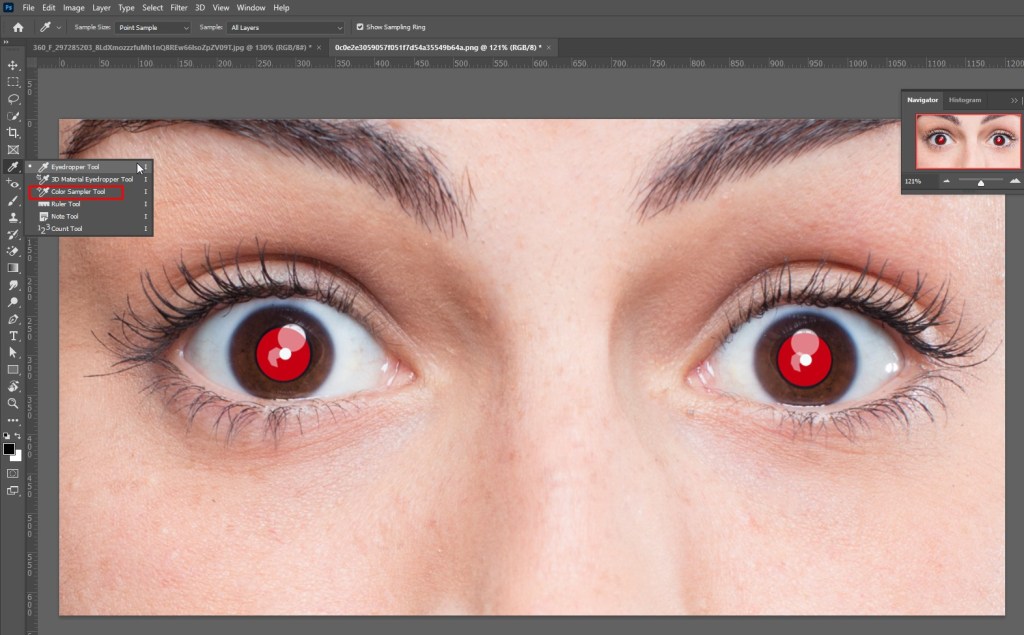
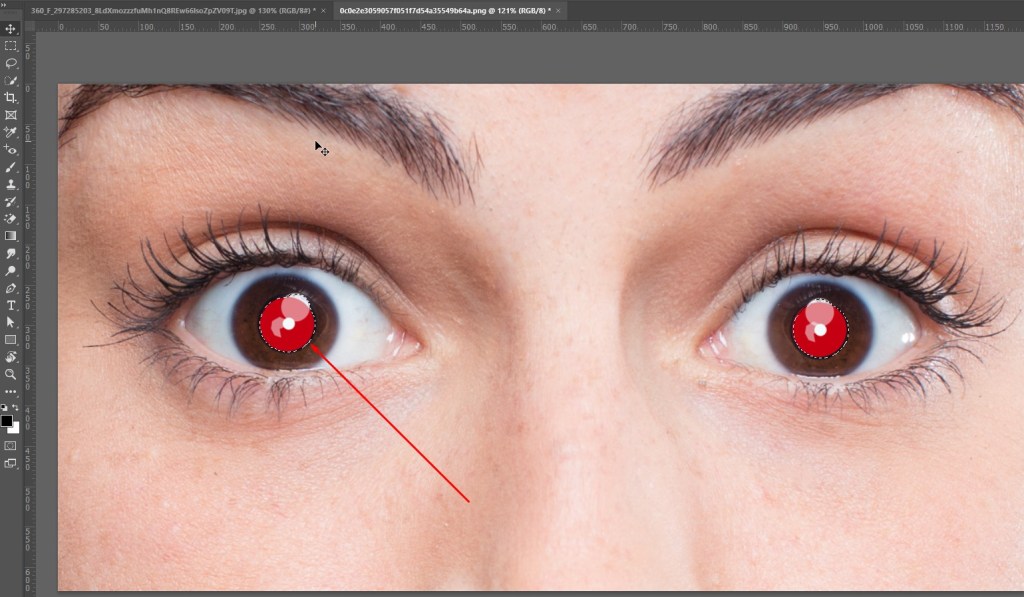
- Select a region of the iris where a trace of the original color may be seen.
- Select Color Replacement Tool while holding down the Brush tool.

- Cover the red portions of the eyes with paint. Clean up any overspray from painting outside the iris with the eraser tool. The Photoshop Burn tool may be used to darken the pupil region.
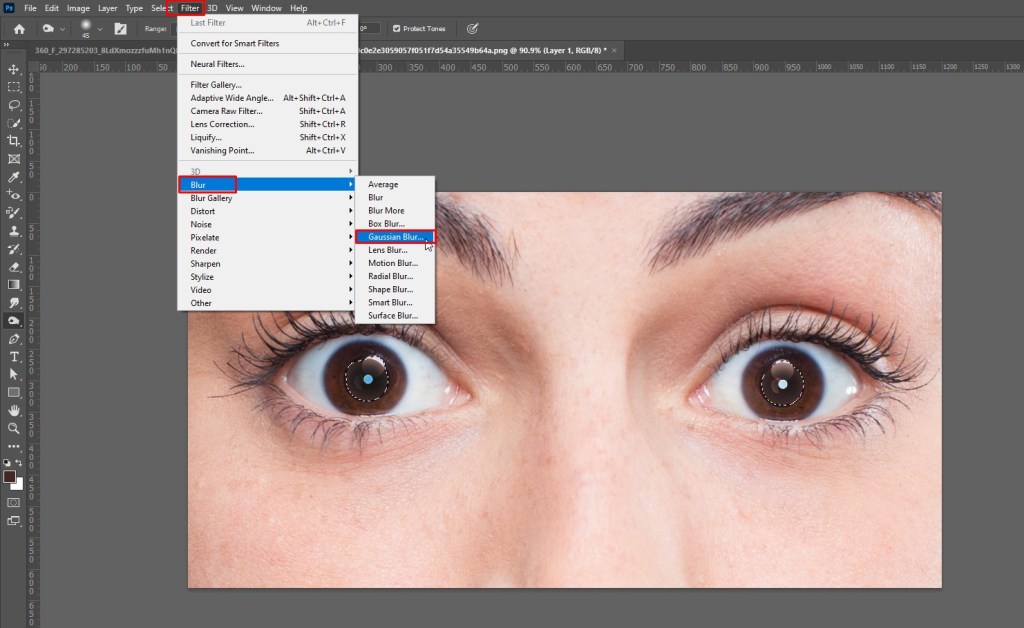
- Go to Filters > Blur > Gaussian Blur and select it.
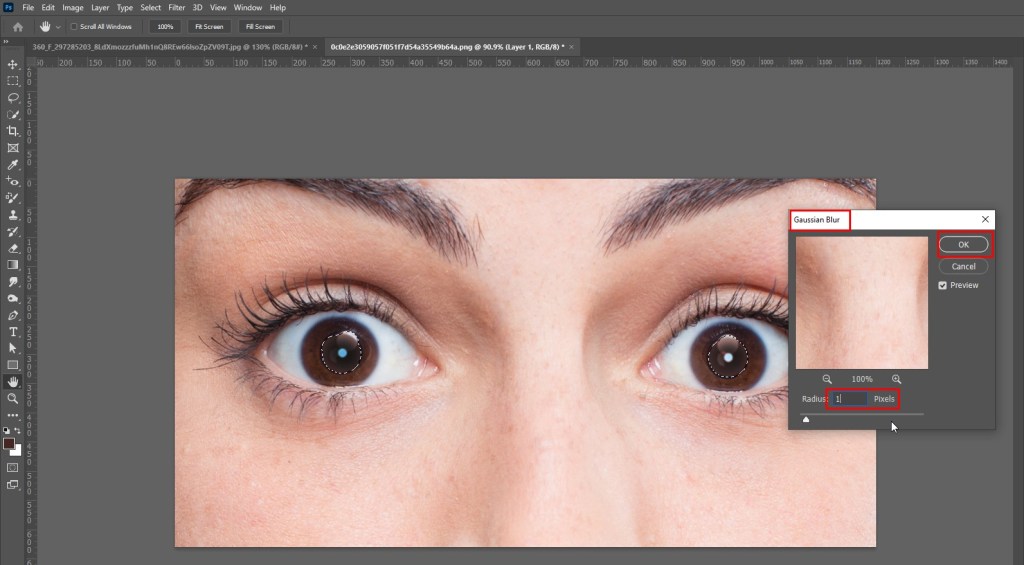
- To soften the borders of the painted area on the layer, set the Radius to 1 pixel and choose OK.
When you’re happy with the outcome, save the file as a PSD or in your favorite picture format.
Remove Redeye in Photoshop – Detailed Guide
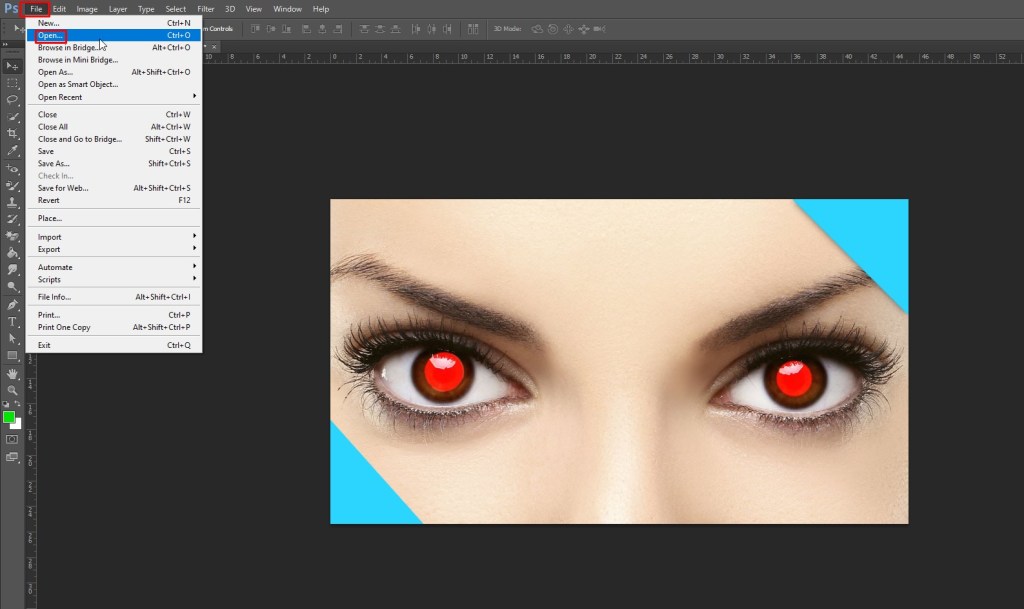
- In Photoshop, open the Samples Images
To begin, open Photoshop and import a photograph of a topic by heading to File > Open… Alternatively, you may drag and drop the files onto the workspace.
- How to Use the Red-Eye Tool
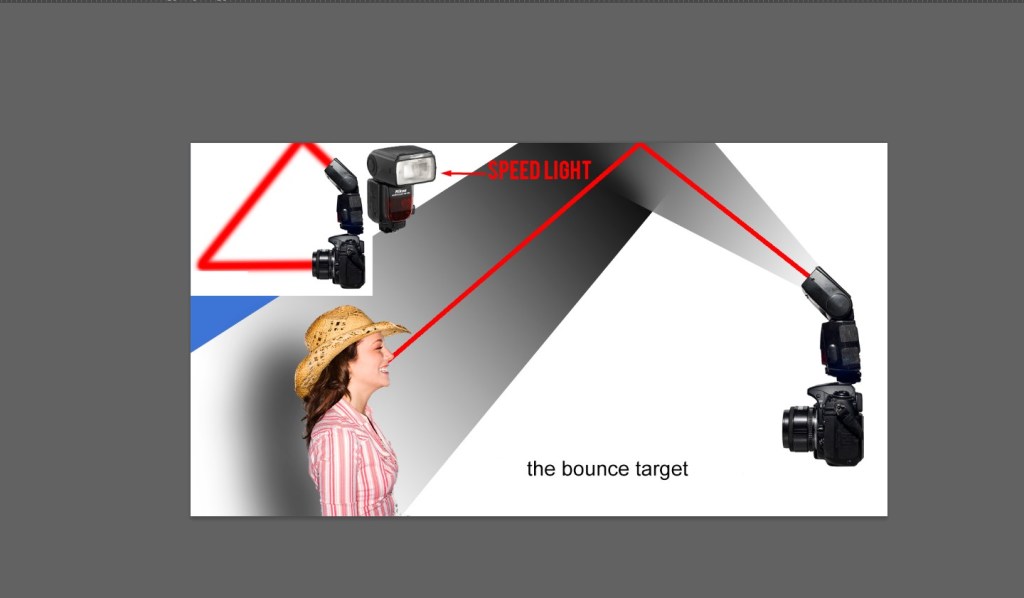
When a strong flash on a camera is utilized in a darkened area and directed towards an individual, red-eye occurs. The flash creates light, which shines directly into the subject’s pupil, bounces off the back of the subject’s eyes, and reflects into the camera.

- Bounce the flash
Use a speed light or bounce the flash off the room to soften the lighting and avoid the person having gold eyes in photos. To avoid the unnatural red-eye appearance, relocate the subject in a naturally light location if the surroundings are still too gloomy.
- Choose spot Healing tool
Locate the Tool Bar on the workspace’s left side. Locate the Spot Healing Tool in the Tool Bar, which is denoted by a band-aid-shaped icon. With the mouse, choose the Spot Healing Tool, and you’ll find that more options emerge within the Spot Healing Tool.
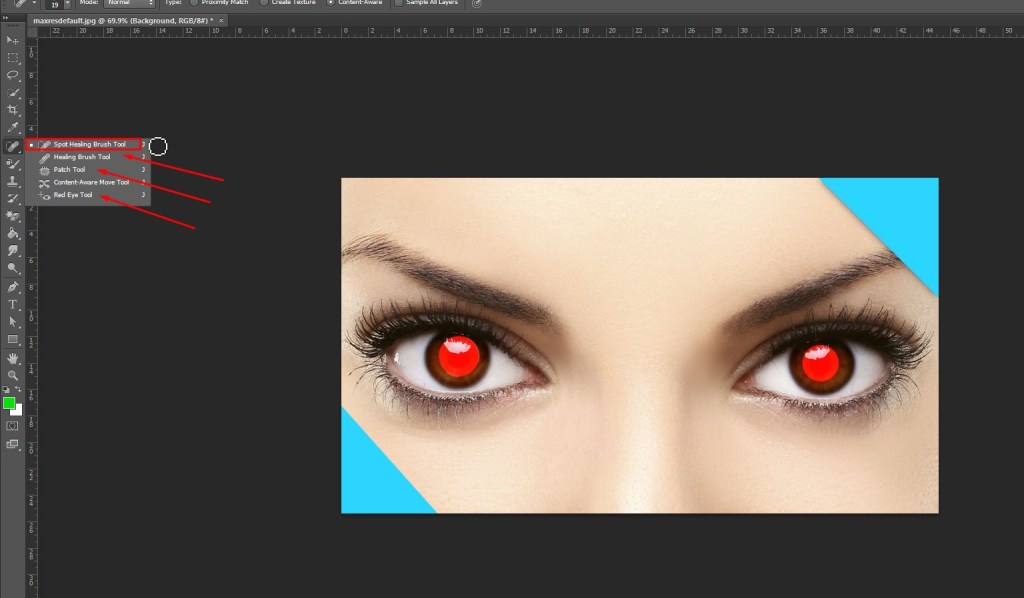
Select the Red-Eye Tool at the bottom of the side tab. The plus and eye-shaped icons distinguish the Red-Eye Tool.
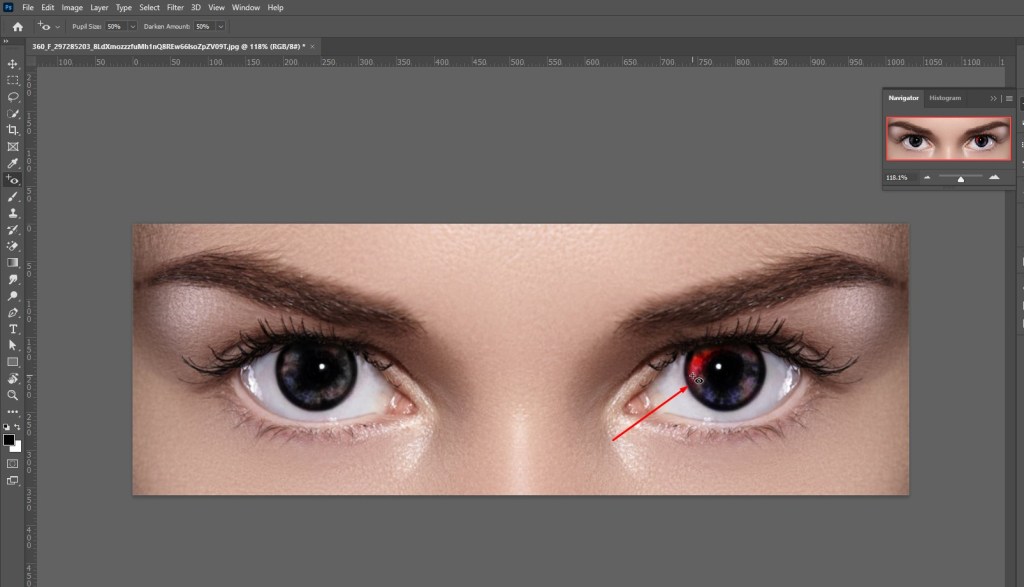
- Adjust Pupil Size
Set the Darken Amount to 50% and the Pupil Size to 50%. To create a square around the pupil, click and drag the mouse. The pupil should be in the middle of the square. Release the mouse once you’ve found a good location. The gold spot in the middle of the eye has been replaced by a natural white spot.
Now, while using the Red-Eye Tool, click and drag the mouse over the other eye, turning both gold eyes white. The subject’s eyes are now brightly lit.
How to remove redeye in Adobe Lightroom?
Using the RedEye Correction feature in Adobe Lightroom to fix redeye in your photographs is a quick and simple process. Pet eye correction in Lightroom Classic works similarly to redeye correction in that it helps you fix abnormal pet eye colors recorded in pictures.
To learn how to touch up your photos with only a few clicks, follow the steps and instructions below.
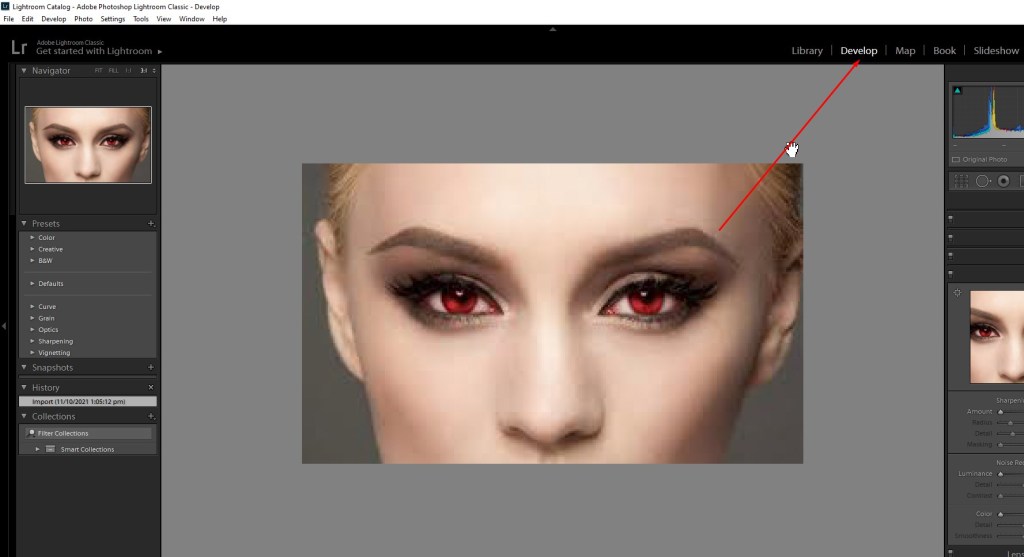
- In Lightroom, choose a photo
In Lightroom Classic, go to the Develop module and select a photo. Do you need assistance importing your photographs into Lightroom? Learn how to add photographs to your computer.
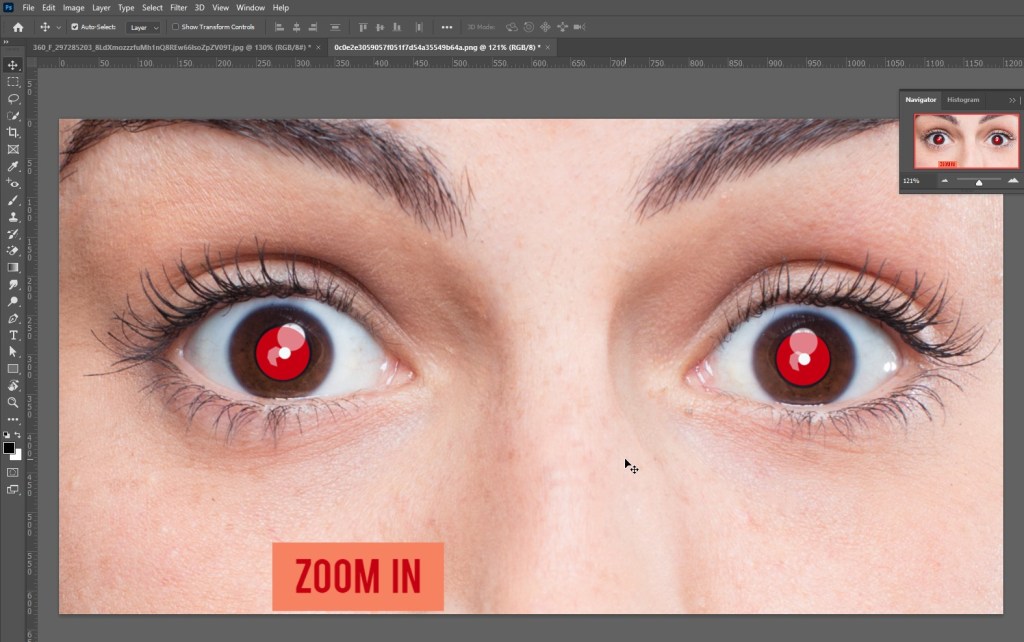
To zoom in, choose the 11 or 21 options in the Navigator panel.
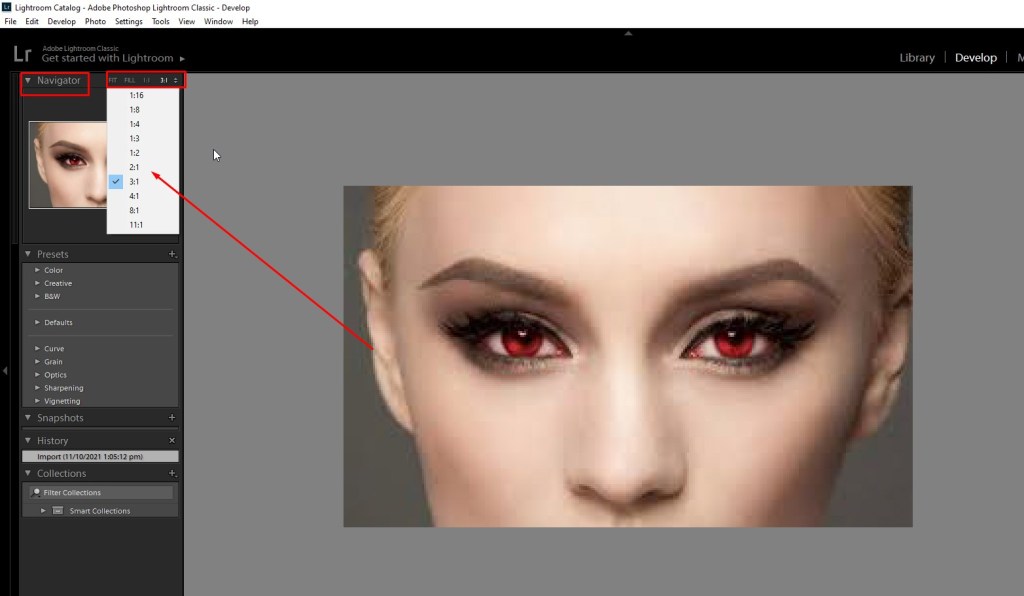
If you need to zoom in any further, select a different magnification by clicking on the double arrows next to the 21 choice. Drag the photo around until the redeye or pet eye is visible.
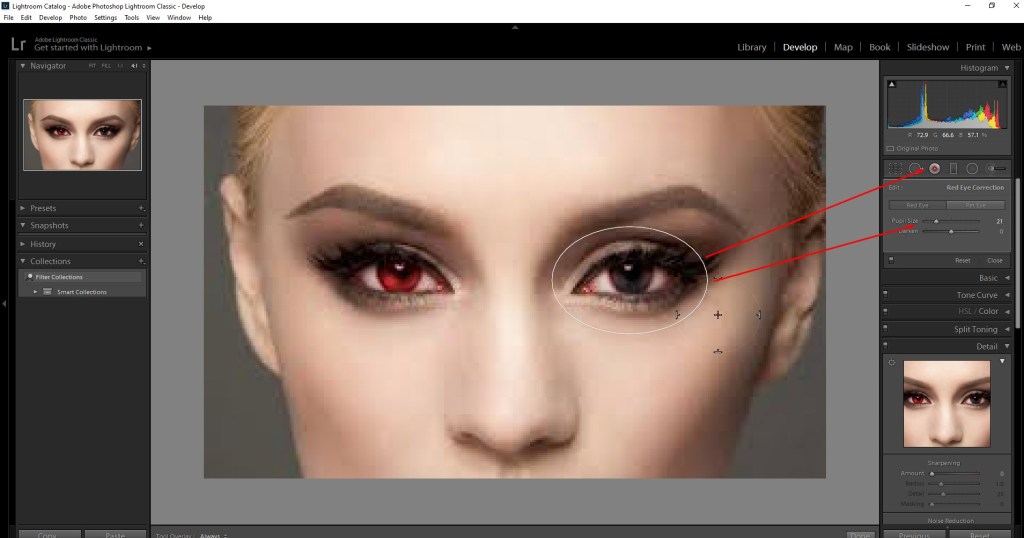
- Select the Red Eye Correction tool from the drop-down menu.
In the Develop panel on the right side of your workspace, select the Red Eye Correction tool. Choose from Red Eye and Pet Eye.
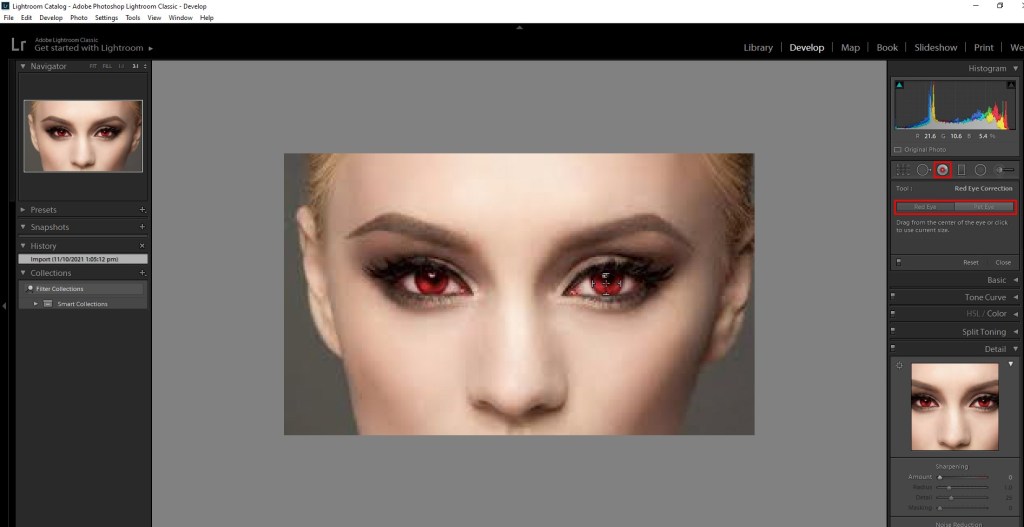
The red staining of a person’s eyes caused by a camera flash can be removed using Red Eye. Pet Eye will correct any yellow or green staining in your pet photographs.
- Drag your mouse over the eye area
Place your pointer on the middle of one of your eyes. Click and drag the tool’s circle outward until it completely covers the eye. When you’re finished, release your cursor.
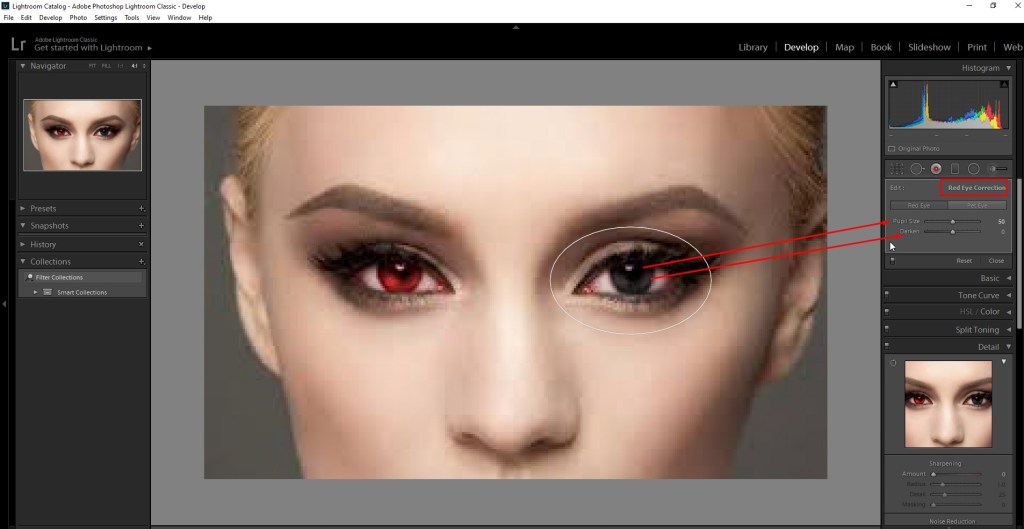
- Adjust the correction area
If necessary, click and drag the circle’s borders to adjust the repair area. You may also move the adjustment area by clicking and dragging inside the circle. Using the sliders in the Red Eye Correction panel, fine-tune the pupil size or the adjustment’s darkness.
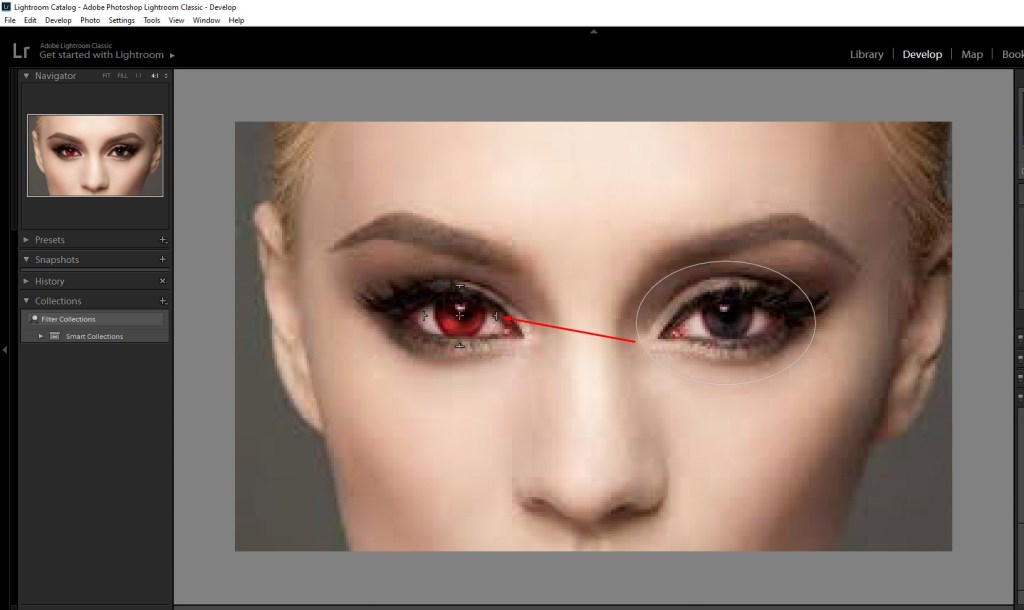
- Repeat with the opposite eye
Click with your mouse in the middle of the opposite eye. The tool size in Lightroom Classic is automatically copied from the first eye. As needed, make adjustments to the correction.
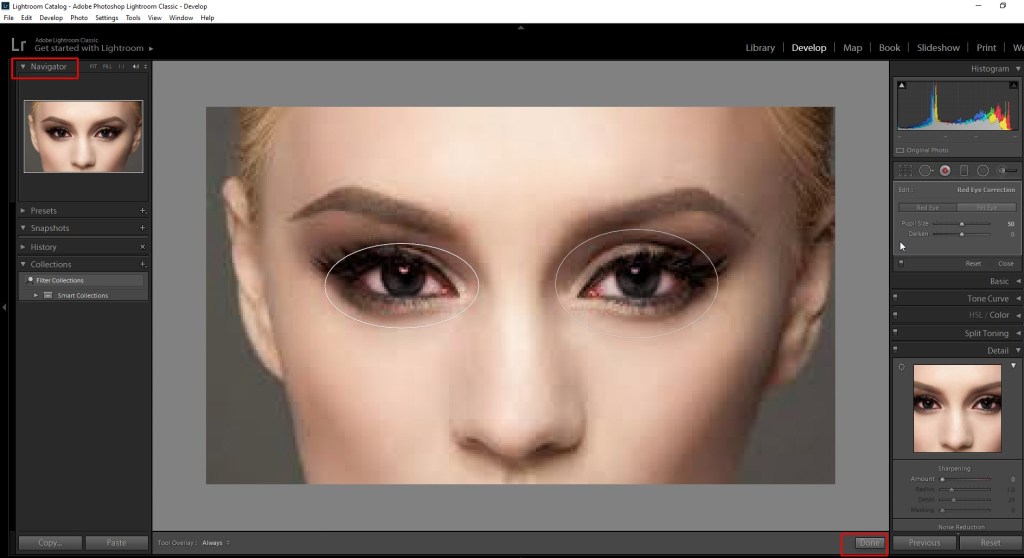
- Examine the red-eye fix
At the bottom of your workspace, select Done. Then, from the Navigator panel, select Fit or Fill to see the whole photo.
Conclusion
That’s it for how to remove redeye in photoshop. You may simply remove or fix redeye using the technique outlined in this article to remove or fix redeye, giving you the freedom to take photographs in the dark with your camera or any smartphone device, knowing that you can address any redeye issues afterward.
The procedure for eliminating redeye is now very simple to utilize. This editing function is simple enough for even beginners to use. This will assist you in improving the appearance of your own photographs.
